Background
Captive Runtime is introduced in AIR 3.0 and it allows the AIR runtime to be packaged with your APK so that when user starts the Android version of your application, the user is no longer required to download and install the AIR runtime (this happens if the user does not already have the same runtime version installed). The drawback is that your application size gets larger. (AIR’s iOS output includes the runtime already).
Read more about Captive Runtime here: http://www.adobe.com/devnet/air/articles/air3-install-and-deployment-options.html.
While the Flash Builder and Flash Develop have added support for outputting Captive Runtime, the documentation is lacking on how to build APK with the Captive Runtime from within the Flash IDE. This article will show you some pointers on how to make an APK with Captive Runtime, using just the Flash CS5.5 IDE.
Requirements
Apart from the Android SDK, it is also assumed that you have already know how to output regular APKs.
To run this example, you need to have installed the AIR 3.0 or later. (When using Flash 5.5, the available AIR version is 2.5 and 2.6. Steps to update Flash IDE to AIR 3.1 are described here: http://kb2.adobe.com/cps/908/cpsid_90810.html.).
The Flag
In order to embed the captive-runtime in Flash CS5.5 IDE, you need to Publish your swf first, then run adt (Android Development Tools that comes with AIR) from the command line, and specifying flags to tell adt to include the Captive Runtime. The flag you want is:
-target apk-captive-runtime
For more details, see the section titled Creating an APK package that includes its own version of the AIR runtime here: http://help.adobe.com/en_US/air/build/WS901d38e593cd1bac-4f1413de12cd45ccc23-8000.html.
More documentations and other flags can be read from the Adobe doc here:
http://livedocs.adobe.com/flex/3/html/CommandLineTools_5.html
Also see: http://help.adobe.com/en_US/air/build/WS901d38e593cd1bac-4f1413de12cd45ccc23-8000.html
Example
Even after reading those, the confusion is where to run adt command from? ADT comes with the AIR SDK and mine is at C:Program Files (x86)AdobeAdobe Flash CS5.5Adobe Flash CS5.5AIR2.6bin (nevermind that it says 2.6, it’s actually AIR 3.1 because I followed the update instruction at http://kb2.adobe.com/cps/908/cpsid_90810.html). You can enter this into the path into the PATH environment variable in Windows in order to be able to run it anywhere, but I didn’t do that because I have multiple versions. Let’s go back to this later, just find where your adt is located for now.
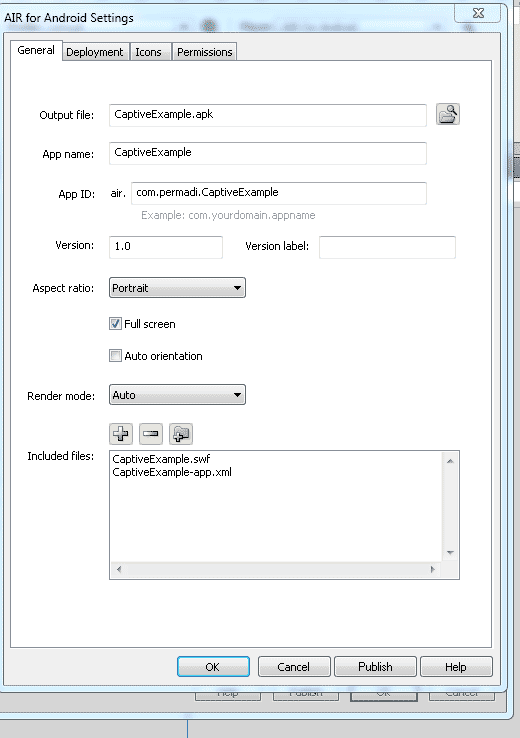
Now going to the Flash IDE. Let’s say in Flash IDE, I have created this FLA, which is set to publish to AIR for Android (via the Flash IDE’s default UI). Here’s how I outputted the APK with Captive Runtime.
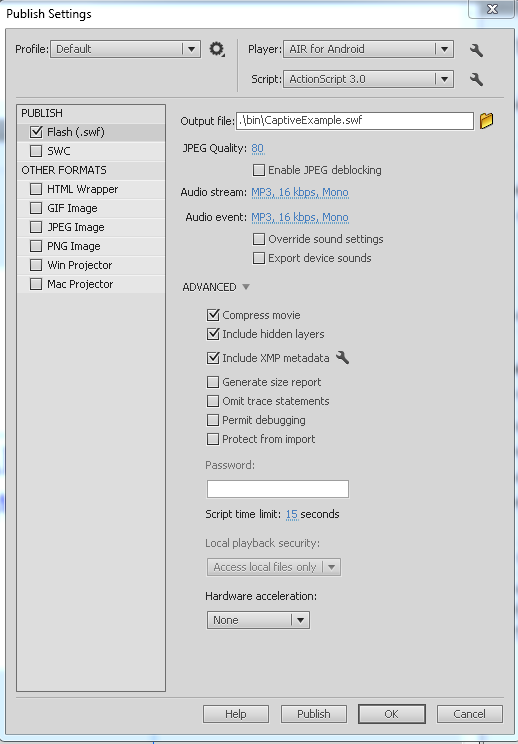
1) The first step is to publish using the Flash IDE (you can also do command line here, but let’s not complicate things further). It doesn’t really matter if the Player is set to AIR for Android or AIR for iOS because the SWF output is what you will really need, but just pick AIR for Android.
There is a catch here in that you should output the swf into a subfolder and I will tell you why later (in the Troubleshooting section). In my case, I output it to bin folder. Also put any external files there if your swf requires them.
2) Go ahead and Publish. You should get the output swf and an APK too (created by Flash IDE) from publishing in Step 1. Again, make sure that your output swf is in a subfolder (bin in my example). You can and should delete that APK because we’re going to create it ourself.
3) Open a command prompt and go to the folder where your FLA is. Run the adt from within that folder. An example is shown below. All below should be run as one line, and don’t forget the . at the end.
C:Progra~2AdobeAdobef~1.5adobef~1.5AIR2.6binadt
  -package -target apk-captive-runtime
  -storetype pkcs12
  -keystore "YOUR_CERTIFICATE_FILE.p12"
  -storepass YOUR_CERTIFICATE_PASSWORD
  "CaptiveExample.apk" "binCaptiveExample-app.xml" -C bin .
Rather than typing everytime, I recommend making a .bat file to run the adt to build a release version, whenever you’re ready.
Some notes:
- Replace C:Progra~2AdobeAdobef~1.5adobef~1.5AIR2.6bin with the path to your adt. PS: When using command-line prompt, in Windows, you must use the DOS path-name, and C:Progra~2AdobeAdobef~1.5adobef~1.5AIR2.6binadt is equavalent to C:Program Files (x86)AdobeAdobe Flash CS5.5Adobe Flash CS5.5AIR2.6bin which where I have AIR SDK installed. This value depends on where you installed AIR ASK, so you can’t just copy that path. If you don’t know how to get the DOS name, this might help: http://answers.google.com/answers/threadview/id/522710.html
- Replace YOUR_CERTIFICATE_FILE and YOUR_CERTIFICATE_PASSWORD with yours.
- Replace CaptiveExample.apk with whet your APK filename should be named (avoid spaces and weird characters).
- Replace CaptiveExample-app.xml with your application XML (this file is created by Flash IDE when you set target to AIR for Android or AIR for iOS.
 This XML file contains the filename of your output swf and other settings and looks something like this:
<?xml version="1.0" encoding="UTF-8" standalone="no" ?>
<application xmlns="http://ns.adobe.com/air/application/3.1">

  <id>CaptiveExample</id>

  <versionNumber>1.0.0</versionNumber>

  <versionLabel/>

  <filename>CaptiveExample</filename>

  <description/>

 ...
</application>
There should be no need to change anything on this XML file.
- Add additional parameters as needed to the adt command. For example, if you use native extension, you need to specify it (would be nice if Flash IDE shows exactly what it is executing).
4) To install to a phone to test, make another batch file, containing something like this (adapted from a Flash Develop batch file).
adb devices
adb -d install -r CaptiveExample.apk

if errorlevel 1 goto installfail

echo.
echo Starting application on the device for debugging...
echo.
adb shell am start -n air.com.permadi.CaptiveExample/.AppEntry

:installfail
echo.
echo Installing the app on the device failed

pause
Replace CaptiveExample.apk with the name of your APK. Replace com.permadi.CaptiveExample with your APP_ID (must be the same as specified in the XML, which gets its value from the Flash IDE). Do not remove the air. prefix because AIR Android app always begins with that — at least I haven’t seen one that doesn’t. Note: What’s adb. It’s the Android Debug Bridge, which you should already have when you installed the Android SDK.
Example
Here’s a simple project that you can use to test: ZIP FIlE
There is a batch file named build.bat to build the captive version. You need to change the path to the adt and other parameters as described in Step 3. There’s also a batch file named run.bat to install and run on a device.
Troublshooting
First of all, remember that the example above only handles the simplest situations and if you use additional options (such as Native Interface) then you need to add them to the adt parameters. Start by using the simple example I provided above to get comfortable with the process. Having said, that, below are some errors that you should not encounter:
- If you’re getting this error:
unexpected failure: inputs not set
java.lang.IllegalStateException: inputs not set
        at com.adobe.air.ApplicationPackager.createPackage(ApplicationPackager.j
ava:61)
        at com.adobe.air.ADT.parseArgsAndGo(ADT.java:557)
        at com.adobe.air.ADT.run(ADT.java:414)
        at com.adobe.air.ADT.main(ADT.java:464)
Make sure the . (period character) is not missing at the end of the adt command (step 3).
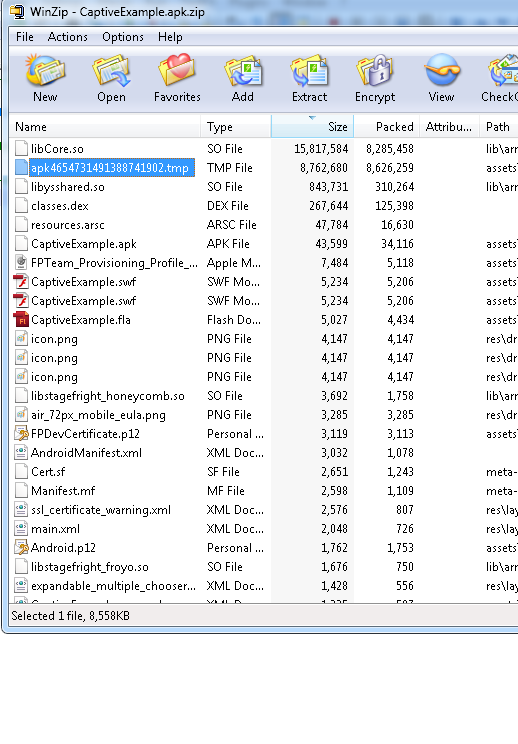
- If your APK output is excessively large (a movie without any code on it should not produce an APK larger than 9MB). This is very likely because you are including unintended files in the APK. Make sure to put files that you want to include in a subfolder (in my example, the swf is inside bin subfolder). Use the -C option when running the adt to tell it to use that folder. If not, the adt‘s temporary output file may be included in the output APK.Here’s a bloated APK example (PS: too see the content of an .APK you can rename it to .ZIP).

See how there’s a lot of junk files (especially the giant 8MB .tmp from nowhere)? This is why you should never run apk from the same folder as your output swf. By the way, that weird tmp file is file created by adt when packing your app and it is NOT supposed to be part of the APK. - You get:
'c:Progra~2Flashd~2toolsflexsdkbinnaad' is not recognized as an internal or external command, operable program or batch file.
This error is because the adt is not found. Make sure the path to adt is correct. In the example above, I mistype bin.
