This tutorial is designed specifically for those wanting to use Eclipse Ganymede (although Eclipse Gallileo is similar, this post won’t deal with Gallileo installation). Note: much of this installation process are described in http://developer.android.com/sdk/eclipse-adt.html and for experienced programmer, that document might be enough. This tutorial is more detailed but if you encounter any problem, you definitely should consult the above document because I did not go over some of the variations that are discussed in that document.
Requirements
Android SDK (free download)
Language to use
Java, C/C++ (using ANDK)
Some Background
Java (not the same as JavaScript) is an object oriented language developed by Sun. It was very popular in the early 90s with its ‘write-once-run-everywhere’ premise and it was one of the early languages to write application and games that can run in browsers, called ‘applets.’ You can see some samples of Java applet on my website. Nowadays, Java is still widely used (Eclipse, dor example, is written in Java) but Java applets has, for the most part, been supplanted by Flash in the browser arena. Flash programmers will find some similarities between Java and ActionScript syntax. However, Java is a stricter language.
For this tutorial, we are going to use an IDE, since I am not a fan of command line stuff. Here I am describing the process using the IDE of choice, which is Eclipse. There are several Eclipse versions out and they don’t always behave as expected since Eclipse is very modular and there are many plug-ins which sometimes conflict with each others and things don’t work as expected. For example, on Windows, I am having problem installing the Android SDK onto an existing Eclipse Ganymede+PDT installation (which already has a bunch of other additional plug-ins I installed over-time).
Fortunately, you can easily have multiple copies of Eclipse that are pretty much independent from each other, running on the same machine. For example, you can have Eclipse version A in c:EclipseA, and version B in C:EclipseB. For this tutorial, let’s start with a new Eclipse installation on a new folder.
I. Download and Install Android SDK.
A. Download the SDK. There are multiple versions available. I am using Android 2.1, Release 1.
http://developer.android.com/sdk/index.html
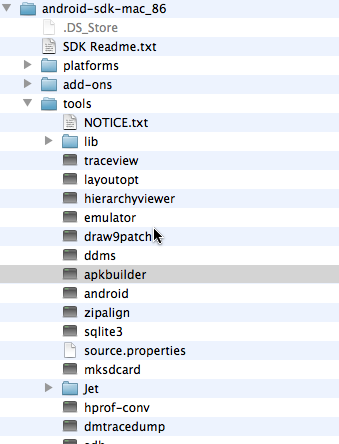
B. Extract the file and place in into a folder. Then open the folder, should look like below:
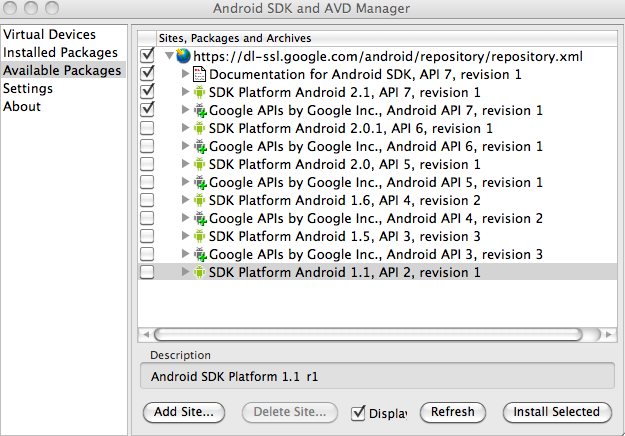
C. Run android from command line or by double clicking (shown above). An application window (looks like below will appear).
D. Select Available Packages, and a list will show up.
Select which version you want to develop for. For this example, I am interested in 2.1.
Click Install Selected.
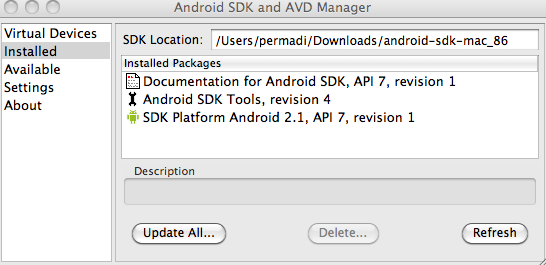
After the installation is done, click the Installed tab on the left, you should see something like this:
E. Creating a Virtual Device.
A virtual device is basically a phone emulator that can be configured to different specifications. Since there are many variations of Android phones in the market, there are parameters that you can set here, such as screen-resolution, memory amount, and SDK version.
Click Virtual Device tab (on the left side of the window).
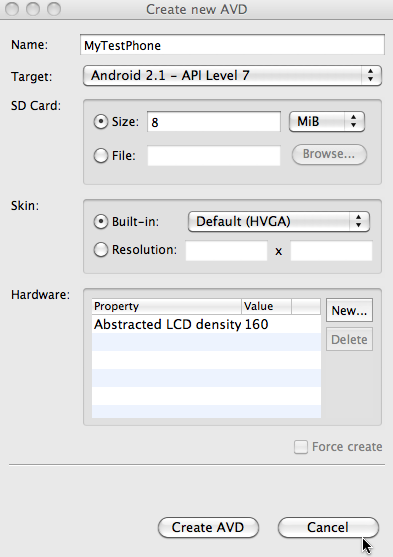
Enter the following as a starter. This creates a basic phone configuration. If using API Level 7, make sure the SD Card size is no less than 8 MiB (or leave the field blank) otherwise you might get some error messages later.
Click Create AVD.
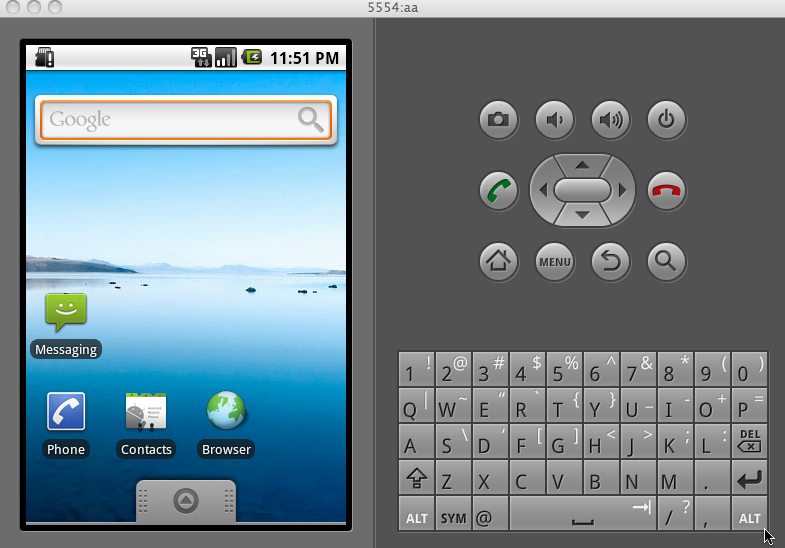
Click Start to test out the device. It should run fine and looks like below (using SDK 2.1). If you encounter problems, check with the Google link above for possible solutions.
You are set with the SDK installation, next we install Eclipse and the ADK.
II. Install And Setup Eclipse
For this tutorial, let’s just start with a fresh Eclipse installation. Google recommend either Eclipse Gallileo or Eclipse Ganymede. Let’ use Ganymede for illustration purpose. You can skip to Step D below if you want to install to an existing Eclipse installation and if you encounter plug-ins conflicts, you can roll-back. But I recommend just starting out fresh to avoid the initial frustration.
A. Download Eclipse
Goto http://www.eclipse.org/ganymede/
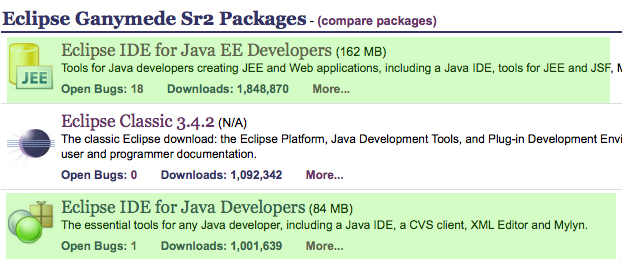
Click the Download link and download one of the Java Developer packages.
The important thing is you should pick one of the Java ones, not C/C++ ones. Ie: one of the green ones below.
When I write this tutorial, I picked the Eclipse IDE for Java Developers. (About box says: Version: 3.4.2, Build id: M20090211-1700)
B. Install the Eclipse IDE
Extract the downloaded Eclipse file onto a new folder. There is no other type of installation process needed.
C. Run the Eclipse IDE
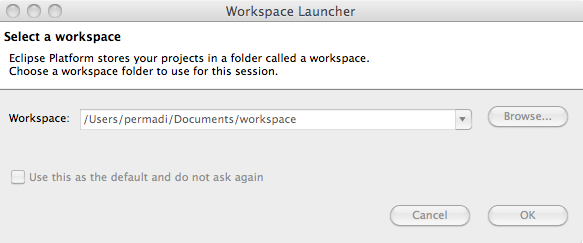
Go to the folder where you extracted the files, then you should find the application file. Run Eclipse.app (if you use Mac) or eclipse.exe (if you use Windows). You will get this dialog if you are a new user.
Pick a folder to be used as your workspace, preferably an empty folder.
(What is the workspace for? Workspace directory is the root folder of your projects. It will contain your project and source files; a workspace can have multiple projects.)
D. Installing the Android Development Tools (ADT) SDK
This assumes you are using Eclipse Ganymede as described above. If you are using Eclipse Gallileo, see http://developer.android.com/sdk/eclipse-adt.html).
1. Go to Menu->Help->Software Updates.
A new dialog appears.
2. Click the Available Software tab.
A new dialog will appear.
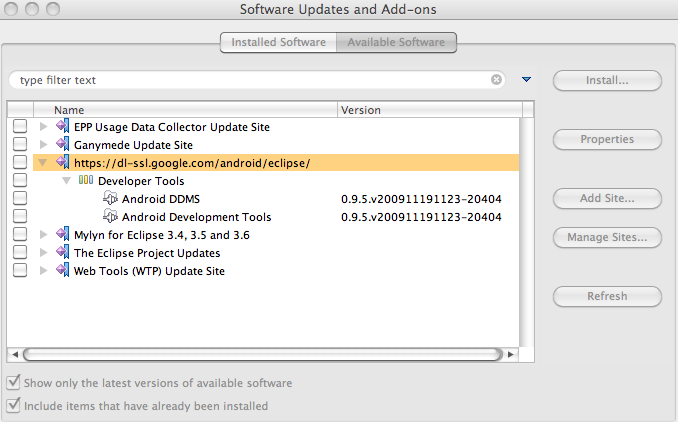
3. Enter: https://dl-ssl.google.com/android/eclipse/
4. Click OK (enter a name if you want to).
You should see Developer Tools listed under the new item (the orange highlight below):
5. Tick the checkbox on the left of that item, then click Install button on the right.
Another dialog will popup:
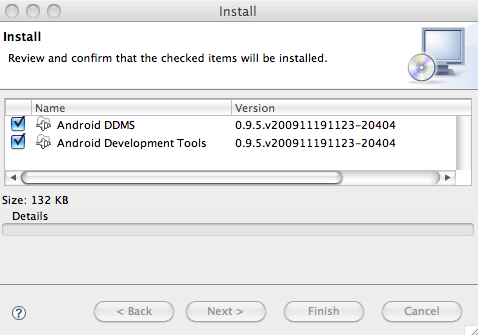 6. Click the Next button and another dialog may ask you to accept the license agreement. If you do accept, then then the installation will continue. If you don’t accept, then… oh well, then I don’t know what to do in that case.
If a problem arises, another dialog may pop-up informing you of the problem. If you download a fresh Ganymede Eclipse Java Development (3.4), then there should be no error. The most common problem is missing a required plugin, if you encounter such problem, it will tell you which missing plugins and you can try searching for them on the internet.
7. A dialog will appear recomminding restarting Eclipse, select Yes.
8. Eclipse should restart and you will most likely see this screen again:
Set the path to Android SDK by going to Preferences menu (Eclipse->Preferences on Mac, Window->Preferences on Windows). Enter the SDK location — it should be the path where you extracted Android SDK in Step IB above.
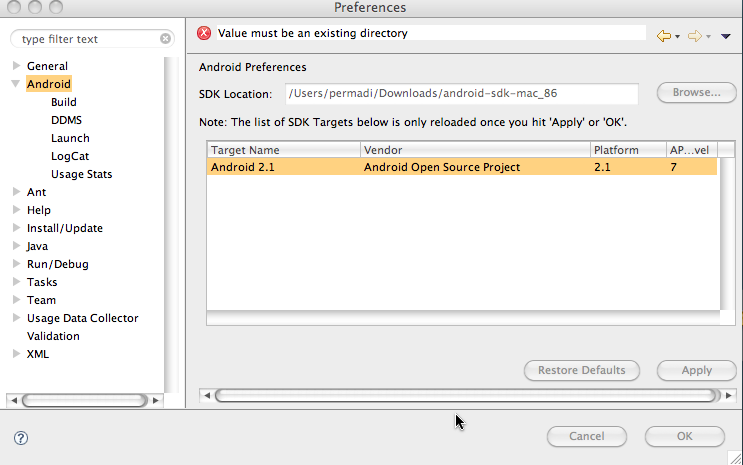
Eclipse is now setup to develop with Android SDK.
In the next tutorial, here: https://www.permadi.com/blog/2010/02/running-andrid-sdk-examples-using-eclipse/ we’ll run the example projects that comes with Android SDK 2.1.
