Android SDK: Creating Three Rows Layout
July 10, 2011
0
One of the most common layout is the three-sections-layout where an application contains a Header section on top, a Content section in the middle, and a Footer section in the bottom. The Header section may contain the application title and the Footer may contain advertisement, buttons, or tabs.
For example in the game below, I am using the Header area to display an About button, the title and a Close button. The footer contains advertisement.
There are many ways to do this and some are better for certain purposes. The one I describe here is one of the most
straightforward and it will give you an idea of the process, which can be adapted to other purposes.
Using RelativeLayout
RelativeLayout allows you to stack Views relative to each other, so you can stack three RelativeLayout with their width set to fill the parent to accomplish this. You can specify math_parent, wrap_content, or fill_parent. Doesn’t matter.
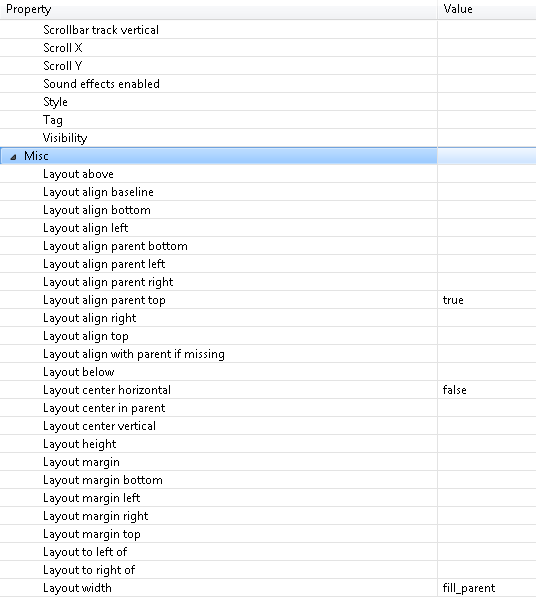
What’s important is the stacking order, which can be manipulated using these properties:
First, let’s create the Header view and the Content view.
<?xml version="1.0" encoding="utf-8"?>
<RelativeLayout xmlns:android="http://schemas.android.com/apk/res/android"
    android:orientation="vertical"
    android:layout_width="fill_parent"
    android:layout_height="fill_parent"
    android:layout_gravity="fill_vertical"
    android:id="@+id/mainView">
    <RelativeLayout
        android:id="@+id/topView"
        android:layout_centerHorizontal="false"
        android:layout_width="fill_parent"
        android:background="#ffffff"
        android:layout_height="50px">
    </RelativeLayout>
    <RelativeLayout
        android:id="@+id/centerView"
        android:layout_width="fill_parent"
        android:layout_height="fill_parent"
        android:layout_marginBottom="50px"
        android:layout_below="@+id/topView">
    </RelativeLayout>
</RelativeLayout>
The important part is where the centerView tells itself to position itself below the topView, using android:layout_below=”@+id/topView
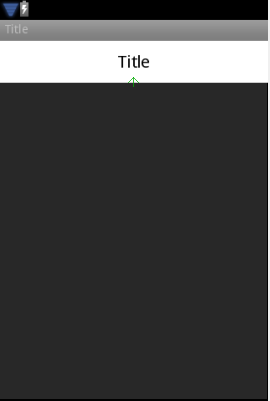
This results in something like below:
Note that you may need to specify the height of the topView . This is usually not a problem since in most cases, you want the height of the header to stay fixed. It’s the content that you usually want to expand to fill the screen.
For the Footer, it’s slightly more complicated. The issue is that we want the centerView to be ‘elastic’ on all screen sizes, so we do not want to hard code its height. But without knowing its height or the footerView’s height, there’s no way for the layout to know where to position the elements. There are two way to handle this:
– set the layout_marginBottom for the centerView. In this way, the centerView will streeth itself to fit the middle part of the screen. You set it like this:
– set the layout_marginBottom for the centerView. In this way, the centerView will streeth itself to fit the middle part of the screen. You set it like this:
    <RelativeLayout
        android:id="@+id/centerView"
        android:layout_width="fill_parent"
        android:layout_height="fill_parent"
        android:layout_marginBottom="50px"
        android:layout_below="@+id/topView">
    </RelativeLayout>
– set the layout_height for the bottomView, like this:
    <RelativeLayout android:id="@+id/bottomView"
        android:background="#fff"
        android:layout_alignParentBottom="true"
        android:layout_width="fill_parent"
        android:layout_height="50px">
    </RelativeLayout>
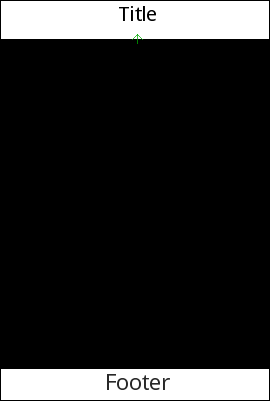
Here’s the complete code that produces this screen (using the second method to set the bottomView ‘s height). Also note the use of
android:layout_alignParentBottom=”true” so that the bottomView is always at the bottom.
<?xml version="1.0" encoding="utf-8"?>
<RelativeLayout xmlns:android="http://schemas.android.com/apk/res/android"
    android:orientation="vertical"
    android:layout_width="fill_parent"
    android:layout_height="fill_parent"
    android:layout_gravity="fill_vertical"
    android:id="@+id/mainView">
    <RelativeLayout
        android:id="@+id/topView"
        android:layout_centerHorizontal="false"
        android:layout_width="fill_parent"
        android:background="#ffffff"
        android:layout_alignParentTop="true" android:layout_height="50px">
        <TextView android:layout_width="wrap_content"
            android:id="@+id/textView2"
            android:layout_alignParentTop="true"
            android:text="@string/app_name"
            android:shadowDx="0.1"
            android:layout_centerHorizontal="true"
            android:textColor="#000000"
            android:layout_centerVertical="true"
            android:layout_height="fill_parent"
            android:layout_centerInParent="true"
            android:textSize="8pt"
            android:height="50px"
            android:gravity="center_vertical|center_horizontal|center">
        </TextView>
    </RelativeLayout>
    <RelativeLayout
        android:id="@+id/centerView"
        android:layout_width="fill_parent"
        android:layout_height="fill_parent"
        android:layout_marginBottom="50px"
        android:layout_below="@+id/topView">
    </RelativeLayout>
    <RelativeLayout
        android:id="@+id/bottomView"
        android:background="#fff"
        android:layout_alignParentBottom="true"
        android:layout_width="fill_parent"
        android:layout_height="50px">
        <TextView android:layout_width="wrap_content"
	        android:id="@+id/textView1"
	        android:layout_height="wrap_content"
	        android:textAppearance="?android:attr/textAppearanceLarge"
	        android:textColor="#000"
	        android:text="Footer"
	        android:layout_centerHorizontal="true">
        </TextView>
    </RelativeLayout>
</RelativeLayout>
DOWNLOAD EXAMPLE PROJECT: ThreeRowsRelativeLayout.zip
Using LinearLayout
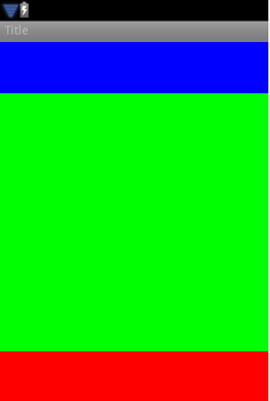
LinearLayout sounds like something that wouldn’t work here, but in many cases, it would. The key here is that you need to specify a weight so that the middle view knows how to size itself. You do not need to specify hard height for the header and footer view, and instead you can use a percentage value that represents the fraction of theight you want to use. Note the use of android:orientation=”vertical”
<?xml version="1.0" encoding="utf-8"?>
<LinearLayout xmlns:android="http://schemas.android.com/apk/res/android"
    android:orientation="vertical"
    android:layout_width="fill_parent"
    android:layout_height="fill_parent"
    android:background="#000"
    android:id="@+id/loadingView">
    <LinearLayout android:layout_width="match_parent"
        android:id="@+id/topView" android:orientation="vertical"
        android:layout_height="wrap_content"
        android:background="#00f"
        android:layout_weight="20">
    </LinearLayout>
    <LinearLayout android:layout_width="match_parent"
        android:layout_height="wrap_content"
        android:id="@+id/centerView"
        android:orientation="vertical"
        android:background="#0f0"
        android:layout_weight="100">
    </LinearLayout>
    <LinearLayout android:layout_width="match_parent"
        android:layout_height="wrap_content"
        android:id="@+id/bottomView"
        android:orientation="vertical"
        android:background="#f00"
        android:layout_weight="20">
    </LinearLayout>
</LinearLayout>
The result:
