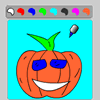
One of the things that I played around several years ago was the GD library, which allows image manipulations and creations on the server-side. I have always want to automate repetitive things such as creating glossy-icons for web-pages. Basically I want to automate the process of converting:
| From this | To this: |
I wasn’t sure if such a glass effect can be done quickly and programmatically on the server-side using GD and PHP. By quickly I meant practically, by not writing a full-fledged tool that walks through every pixels doing multiplications and RGBA blending.
One thing that you should be aware is that HTML5 will soon support this kind of image manipulations using plain Javascript. But for now, I’m trying to see if I can do it with PHP GD.
For starter, I knew that I needed to create an overlay in Photoshop to blend with the icons. Since my Photoshop skill is rusty nowadays, I found a tutorial that explains the process well here: http://www.secondpicture.com/tutorials/digital_image_processing/glass_button_in_photoshop.html.
Here’s the one than I made by following that tutorial.

Note: My icons will be 100×100, but the dimension of this overlay image is 130×130 pixels to accomodate the drop shadows around the edges.
Turns out that the PHP programming is quite straightforward, using the imagelayereffect() to set the overlay blending mode. Note that what the code is doing is actually setting the overlay-image as the target of imagecopy() and not the other way around.
<?php
   // Load the image where the logo will be embeded into
   $image = imagecreatefrompng("icon.png");

   // Load the overlay image
   $overlayImage = imagecreatefrompng("overlay.png");
   //imagealphablending($overlayImage, true);

   // Get dimensions
   $imageWidth=imagesx($image);
   $imageHeight=imagesy($image);

   $overlayImageWidth=imagesx($overlayImage);
   $overlayImageHeight=imagesy($overlayImage);

   imagelayereffect($overlayImage, IMG_EFFECT_OVERLAY);

    // Paste the logo
    imagecopy(
        // destination
        $overlayImage,
        // source
        $image,
        // destination x and y, centered
         ($overlayImageWidth-$imageWidth)/2, ($overlayImageHeight-$imageHeight)/2,
        // source x and y
        0, 0,
        // width and height of the area of the source to copy
        $imageWidth, $imageHeight);

   // Set type of image and send the output
   header("Content-type: image/png");
   imagePng($overlayImage);

   // Release memory
   imageDestroy($image);
   imageDestroy($overlayImage);
?>
The result:
 |
 |
 |
|
 |
To test the script, you need to have two images: icon.png and overlay.png (and have GD installed of course, see here for more on GD). Or, head over here to see a tool I wrote:Glossy Icon Creator.
Once I knew that this is working, I can change this line to accept icon filename and the script will return the glossy version.
$image = imagecreatefrompng($_GET['imageFilename']);
In the html side, I can then say something like this to automatically render the glossy version:
<img src="/scriptFolder/imageprocessing.php?imageFilename="icon1.png"></img>
Note: this isn’t practical in a serious app. In a serious app, you should maintain the processed images into a cache and have the script pull from the cache if the processed image already exists.
Also, another thing I didn’t do here is checking for filename extension and adding security measures such as making sure the image is actually from your server. The filename extension check is needed if you are going to support other image types. See imagecreatefromgif(), imagecreatetojpeg() if you want to support them.
Links and Downloads:
-Overlay (PSD for CS3 or newer, PNG)
–Glossy Icon Creator
–PHP GD Documentation