What is JNI? JNI is a set of specifications/framework that allows Java code to call C/C++ native code. In Android world, JNI is supported through the Android NDK (I think NDK stands for Native Development Kit but even Google doesn’t say what it really stands for on their page: http://developer.android.com/sdk/ndk/index.html). You still need to use Java to call the Native Interfaces, but you can code most of you app in C/C++.
Why use JNI? I can think of two obvious answers:
1. Execution speed (Java is almost always slower than C/C++ and it is easier to optimize C/C++ code than Java code).
2. Porting from a large C/C++ code-base, for code reuse, to save time and efforts.
Most NDK techniques requires the use of command-line and some sort of Linux shell and that one thing that I really dreaded, but if you are brave enough here’s a link to the documentation: http://developer.android.com/sdk/ndk/overview.html. Luckily as Android matures, there are several plug-ins that simplifies this, such as Sequoyah: http://www.eclipse.org/sequoyah/documentation/.
This guide assumes that you have already have a basic Android SDK set-up and you know how to compile and run the regular sample projects, as well as creating basic projects.
Let me warn beforehand you that getting the NDK to work can be frustrating — things can go wrong in different parts. There is not a single package which allows you to just sit back and install just one thing. You need to install a lot of components, change paths, change settings, and more. Further complexity added by many different Eclipse versions and configurations, conflicting plug-ins, missing prerequisted plug-ins, etc.
I recommend starting out with a fresh Eclipse install to avoid unnecessary headache altogether. Since Eclipse installation basically only involves extracting the files (and having Java installed), you can have multiple copies of Eclipse as long as they are in different folders.
Setting Up The Development Environment
1. Install Eclipse and the Android SDK
I am using Eclipse Indigo for this guide. I’m running Windows 7. Here’s the Eclipse About box in case you need it for reference or want to use the exact same one:
Eclipse SDK
Version: 3.7.0
Build id: I20110613-1736
(c) Copyright Eclipse contributors and others 2000, 2011. All rights reserved.
Visit http://www.eclipse.org/platform
This product includes software developed by the
Apache Software Foundation http://www.apache.org/
Here’s the download link that I use: http://download.eclipse.org/eclipse/downloads/drops/R-3.7-201106131736/winPlatform.php#EclipseSDK.
Android SDK can be retrieved from: http://developer.android.com/sdk/installing.html. I also wrote a guide here: https://permadi.com/blog/2010/02/getting-started-with-android-development-with-eclipse/.
2. Install Eclipse C/C++ Development Tools
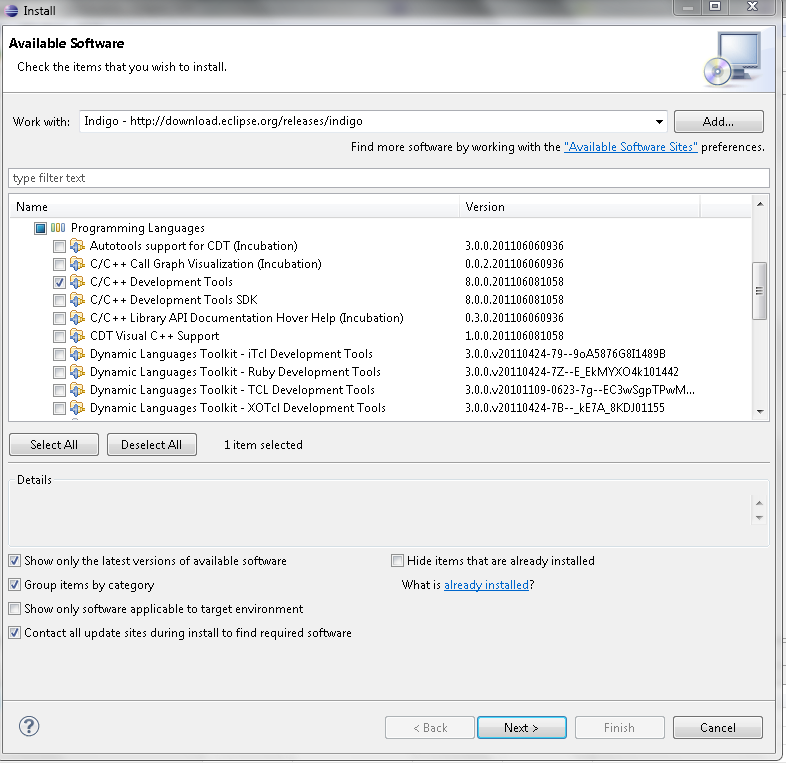
After Eclipse is installed, run it and go to the menu->Help->Install New Software. Select the Indigo or CDT update site. Select Programming Languages and select/check C/C++ Development Tools
Click Next and install.
3. Install Sequoyah Plug In
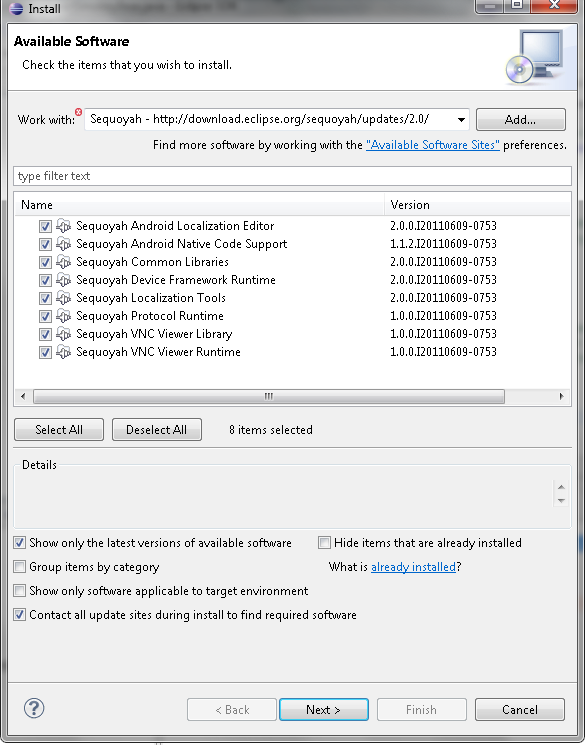
The Sequoyah Android plug ins is awesome, this is one plug-in that you need in order to avoid the Command Line stuff. Download it from the update site. I used http://download.eclipse.org/sequoyah/updates/2.0/ — this link is meant to be entered in Eclipse, not in the browser. You can read more about Sequoyah here: http://www.eclipse.org/sequoyah/documentation/.
Again, from menu->Help->Install New Software and enter the update site above. You must uncheck Group Items By Category checkbox (can be seen in the bottom half of the picture below) to see the available components and then just select them all. I am not sure which one is really needed, but I didn’t want really care since there’s no harm installing all.
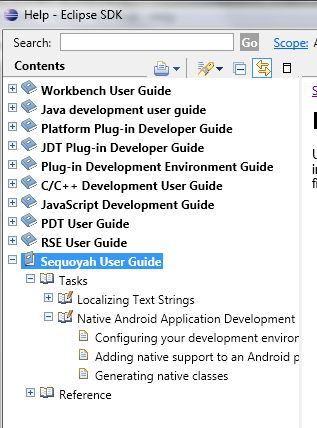
Once you have Sequoyah installed, I recommend checking out the Sequoyah User Guide section in the Eclipse Help menu at some point because it contains some useful information, some which helped me throughout the way of getting the process going. I will guide you through the setup here so you can skip it for now, but if you encounter issues that are not covered here, check there first.
4. Install Android NDK
In addition to the Android SDK (https://dl-ssl.google.com/android/eclipse/), you need the Android NDK. You can get the NDK from: http://developer.android.com/sdk/ndk/index.html. Download and unzip the Android NDK manually (not inside Eclipse). I am using android-ndk-r5c for this guide. I recommend using the latest but if something doesn’t work and you want to narrow down the issue, here’s the link to the version I use for this guide: http://dl.google.com/android/ndk/android-ndk-r5c-windows.zip.
5. Add the PATH of the unzipped Android NDK.
Add the root of the folder where you installed the NDK into the OS environment variable. For instance, since I unzipped the file into: C:android-ndk-r5c, then the PATH to add is C:android-ndk-r5c, not any subfolder within it.
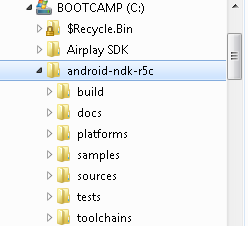 Note that there are some sample code in the NDK, but we’re ignoring them for now since they require more complicated compilation process and they do not have Eclipse projects (you’ll need to create the projects by hand).
6. Add Androind NDK path into the Eclipse Android Preferences:
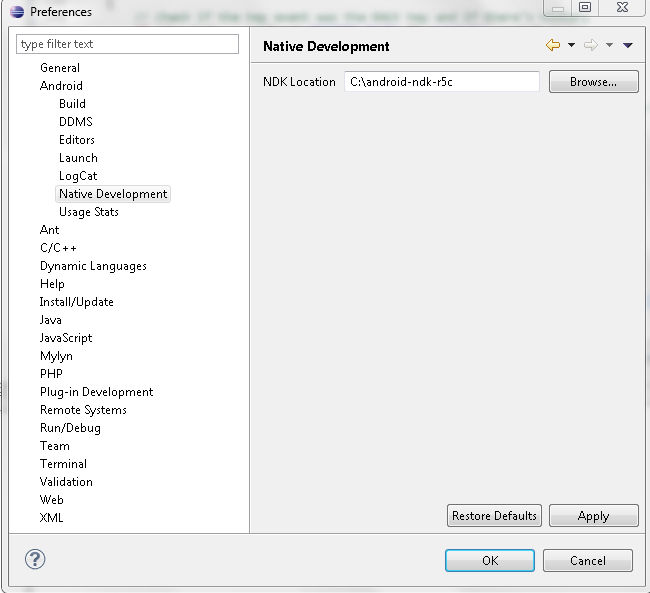
Open the Eclipse Preference (menu -> Window->Preferences), navigate to Android->Native Development then enter the path (yes, the same path as in step 5 again — frankly I am not sure if just doing this step without doing step 5 is enough, so just do both). If you don’t see this option on the Eclipse Preference, restart Eclipse.
6. Review
Now we’re done with installing Eclipse stuff. To review, here’s my Eclipse configuration (click the image to zoom in). You can ignore the PDT and PHP plug-ins, I have them just because I’m doing PHP for other stuff.
7. Install Cygwin
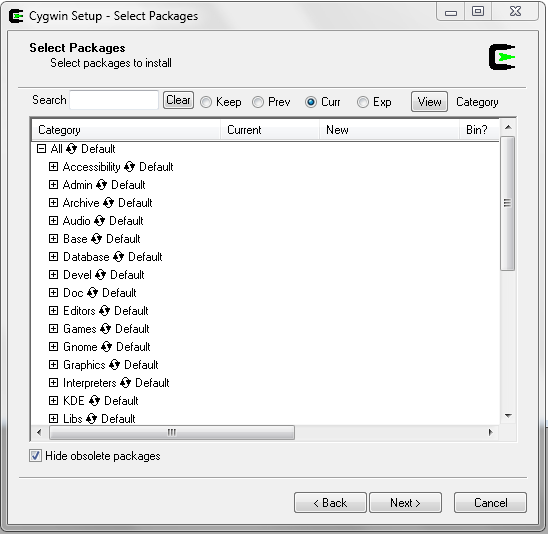
Go here, download and run the setup.exe. I am not 100% sure which components to install but you should just install all the Default components.
IMPORTANT: One component that is not on the default list is the “make” component, under Devel category, make sure to include that when you install.
After installing, add the bin of the folder where you installed cygwin into the OS environment variable (for example: C:cygwinbin).
8. Restart Eclipse so that all these changes are known by Eclipse.
Creating A Test Project
Now that we’re done with those ridiculous effort to get the environment set up, we are ready for some fun. I still recommend to brace yourself for some surprises and cryptic errors, but it’ll be worth it once you got it running.
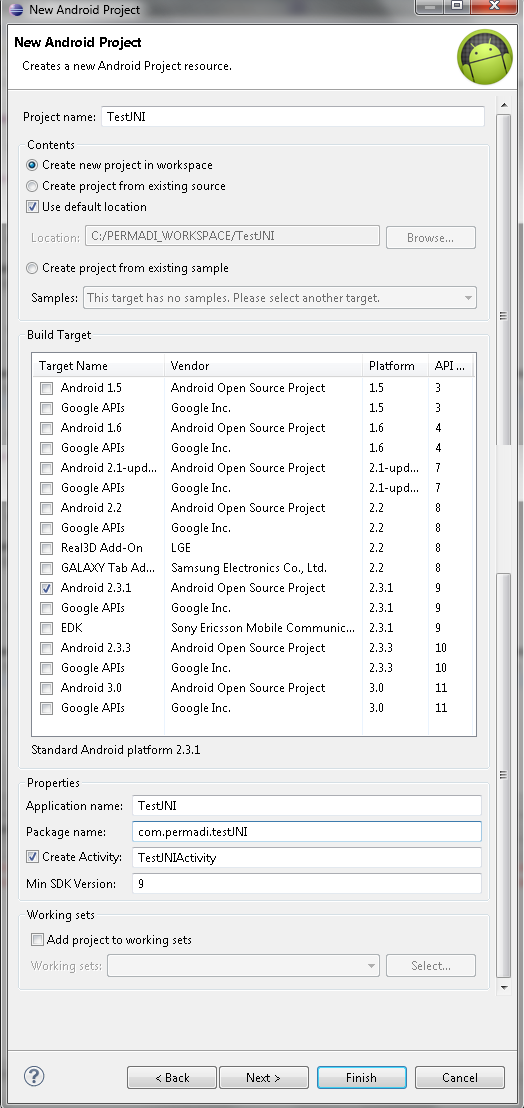
1. Create a New Android project.
Select API level of at least 9. Do not use <space> in the project name or Android NDK may complain later.
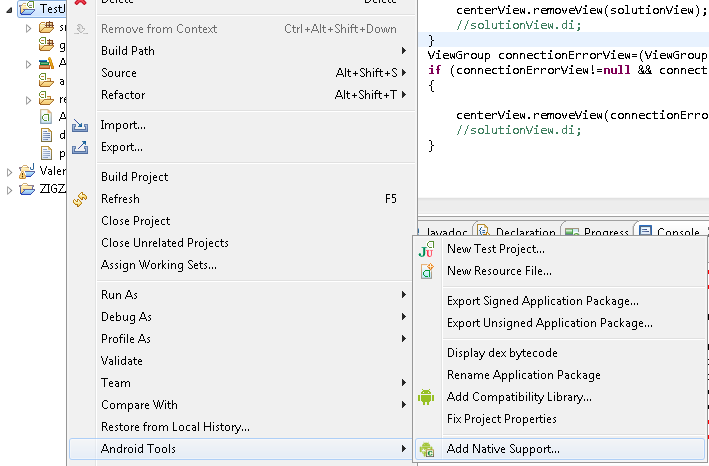
2. Add Native Support
This is where Sequoyah do its action.
Right click the project on Eclipse Workspace, then select Android Tools -> Add Native Support.
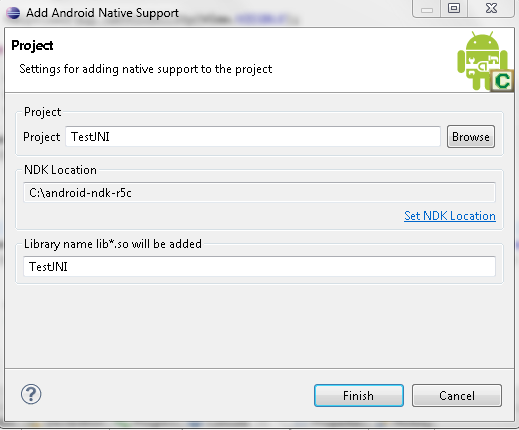
This dialog should come up:
Just leave the default values as they are. (But if the NDK location is wrong then set it to the path where you installed the Android NDK.)
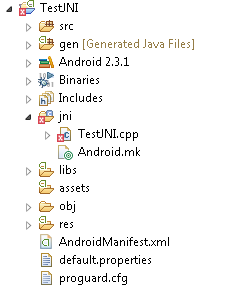
What this process does is create a Makefile and a stub C++ file for you. You should see a folder named jni which has been automatically created for you as a subfolder inside your project folder. Inside the jni folder, you should see an Android.mk and a .cpp file.
The cpp file is empty right now but you should take a look at it just for fun. We’re are finally ready to test building something. So do Build Project.
Examine the Eclipse Console (to open it, use menu: Window->Show View->Console if it’s not visible already). You should see something like this:
**** Build of configuration Default for project TestJNI ****
bash C:android-ndk-r5cndk-build V=1
cygwin warning:
 MS-DOS style path detected: C:PERMADI_WORKSPACETestJNI
 Preferred POSIX equivalent is: /cygdrive/c/PERMADI_WORKSPACE/TestJNI
 CYGWIN environment variable option "nodosfilewarning" turns off this warning.
 Consult the user's guide for more details about POSIX paths:
 http://cygwin.com/cygwin-ug-net/using.html#using-pathnames
rm -f /cygdrive/c/PERMADI_WORKSPACE/TestJNI/libs/armeabi/lib*.so /cygdrive/c/PERMADI_WORKSPACE/TestJNI/libs/armeabi-v7a/lib*.so /cygdrive/c/PERMADI_WORKSPACE/TestJNI/libs/x86/lib*.so
rm -f /cygdrive/c/PERMADI_WORKSPACE/TestJNI/libs/armeabi/gdbserver /cygdrive/c/PERMADI_WORKSPACE/TestJNI/libs/armeabi-v7a/gdbserver /cygdrive/c/PERMADI_WORKSPACE/TestJNI/libs/x86/gdbserver
rm -f /cygdrive/c/PERMADI_WORKSPACE/TestJNI/libs/armeabi/gdb.setup /cygdrive/c/PERMADI_WORKSPACE/TestJNI/libs/armeabi-v7a/gdb.setup /cygdrive/c/PERMADI_WORKSPACE/TestJNI/libs/x86/gdb.setup
Install        : libTestJNI.so => libs/armeabi/libTestJNI.so
mkdir -p /cygdrive/c/PERMADI_WORKSPACE/TestJNI/libs/armeabi
install -p /cygdrive/c/PERMADI_WORKSPACE/TestJNI/obj/local/armeabi/libTestJNI.so /cygdrive/c/PERMADI_WORKSPACE/TestJNI/libs/armeabi/libTestJNI.so
/cygdrive/c/android-ndk-r5c/toolchains/arm-linux-androideabi-4.4.3/prebuilt/windows/bin/arm-linux-androideabi-strip --strip-unneeded C:/PERMADI_WORKSPACE/TestJNI/libs/armeabi/libTestJNI.so
**** Build Finished ****
Pay close attention because errors are not always obviously marked (they are highlighted with a faint red background in the Console. If there is no error, then congratulations. Most of the hard part are done and the set-up is working. If there’s any error, try making sure all steps are done; or have a look at the Sequoyah manual (it may have more hints); or check the bottom section of the next tutorial to see if any of the errors apply. There’s one common errors that I would mention here, which is below:
**** Build of configuration Default for project TestNDK ****
ndk-build V=1
Error: Cannot run program "ndk-build": Launching failed
**** Build Finished ****
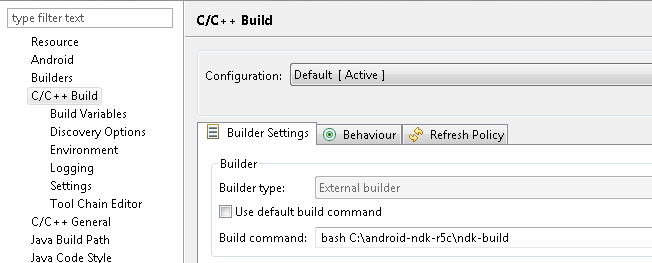
To solve this, add the full path to the ndk-build command in the Project settings. For instance, since I have the NDK at C:android-ndk-r5c, I entered bash c:android-ndk-r5cndk-build.
In the next part, we will add some C++ code to call from Android: https://www.permadi.com/blog/2011/09/creating-your-first-android-jnindk-project-in-eclipse-with-sequoyah/.
