INTRODUCTION TO MASK
 

BACKGROUND

  
When you wear a mask, you hide parts of your face, but not your eyes.  It is said that the mask filters out your face (it hides everything except your eyes).  

Flash 8 users might want to see this other tutorial on creating a better looking mask with smooth edges.

Masking is a familiar technique in computer graphics (and computer science in general).  It basically refers to a method of hiding or filtering data.  You have a set of data, when a mask is applied to that data, you get a new set of data which is a filtered version of the original data.  

Data > Mask > Modified Data

For instance, say you have a secret number written on a paper, and you want other people to be able to see only the 3rd digit.  What can be done?  Let's see.  

Here's the number written on a nice orange paper:

Since you want others to be able to see only the 3rd digit, you can erase everything except the 3rd digit.  Or, you can cut the paper, leaving out only the 3rd digit.  But what if you don't want to mess up the paper and you want to keep all the numbers intact (because, for example you might want to allow some other people to see the 4th digits, instead of the 3rd, in the future).  

Well, here's an idea,  you can get another paper and put a hole on the location of the 3rd digit.  You can then put this paper on top of the other paper.  Here's the paper cutout.

When you put this paper on top of your digits, you essentially only show the 3rd digit.  

Congratulations, you've just made a mask.  The paper with the hole is a metaphor for a mask.  

Now, if, for example, you want the last digit also to be visible, you can cut another hole on the mask paper.  

Then, if so some reason, you want to show each digit sequentially, you could move around the mask, like this (I'm making the mask paper a bit transparent here so you can see what's going on behind the mask):  


Notice one thing here: I had to make the mask larger than before to cover the number; otherwise, some unwanted areas might be showing up.  (This is an important point to remember because when you get into graphical software such as Flash or Photoshop, you will understand why they don't exactly follow this metaphor.)

Bad mask (too small) to hide the "11" at the beginning.

Now you have an idea what a mask is, and what it can be used for.  Eq:
  • To filter data.
  • To hide parts of data.
  • To compose a new sequence of data (example: in animation).

Now, the important thing to remember is that:

  • With mask, you can do all of those without destroying/modifying the original data.  
  • A mask can be applied on different data source (eq: you can use the same mask on the previous example to show the 3rd digit of any number, not just 11101101). 

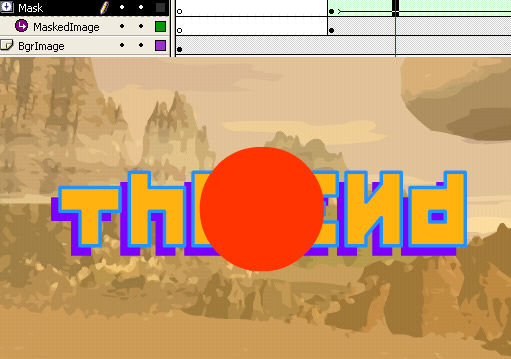
Let's move on to the Flash mask.
  

FLASH MASK

  
Let's go back to the previous example and try to do it in Flash.  Open a new document and create two layers.  Put the number on the bottom layer, and put the mask on the top layer.

Now move the mask to cover the number so that only the 3rd digit is visible. 

So far so good, although this is a good emulation of mask, it is not a real Flash mask.  To see why Flash (and other software) doesn't do mask this way, let's see what the problem is with this approach.  

Move the mask out, and add more digits to the number, don't change the mask:  Here I added "01" at the end of the number.

Now, again, move the mask to cover the number so that only the 3rd digit is visible.  Can it be done?

No, not without changing the mask size.  And that's the problem with this approach: if you change the data representation (ie: the image size), you most likely need to change the mask too.  Let's fix it with a real Flash mask.   

Move the cutout so it looks like below:

Right click on the Mask layer and select Mask.

What you have done is to make the content of the Mask layer a mask.  The Mask layer will be applied to the content of the layer below it.  

You might be surprised to see the result, which shows the opposite of our previous fake mask:  

The thing to remember is that in in Flash (and in other graphic editor software):
hollowArea=hidden, opaqueArea=not hidden.  So here you see the 3rd digits  disappear because they're not covered by an opaque area.  

Let's edit the mask to conform to this new rule, but first, you need to unlock the Mask layer so that it can be edited (click the lock symbol next to the layer to unlock the layer).

Following the rule of "hollow=hidden, opaque=visible," we fill the hollow square with a different color (it doesn't matter what color you use).

And then we take out the red areas completely.

Lock the mask layer again so that you can see the result.

Sure enough, it works.  Now you can even add more digits to the number and the mask will still work.  You can resize the stage, or animate the mask so that it moves from digit to digits (using motion Tween), all just by moving the mask.  

Consider if you have to do masking the other way.  If you have a small object that needs to be masked, and your stage is huge, imagine what mess the mask will look like: you'll need to draw a big square to enclose the stage and a tiny hollow area to show the small object.  And what if the small object is moved from a corner to the other corner of the stage: you'd need to make your mask larger than the stage!  What if the stage size changes?  

Here are some things to know about masking:

  • Mask must be placed on a mask layer.  
  • You can have more than one shape on one mask layer.
  • You can use almost anything except lines as a mask.
  • You can animate the mask (see example).

Now let's see some examples where mask are useful.       
  

SOME APPLICATIONS OF MASK

EXAMPLE1: TEXTURED TEXT
Here I have a text on the Mask layer.  The Mask is the yellow text.

This is the result:


EXAMPLE2: TRANSITION EFFECT
Here I have a red circle used as a mask that is being applied to a semi transparent background text "the end", and at the bottom layer, there's another image.

This is the result:

The mask gradually reveals the text while covering the background.  You can read more details about this effect here.

Flash 8 users might want to see this other tutorial on creating a better looking mask with smooth edges.


(C) F. Permadi

<<MORE TUTORIALS>>